| 일 | 월 | 화 | 수 | 목 | 금 | 토 |
|---|---|---|---|---|---|---|
| 1 | 2 | 3 | ||||
| 4 | 5 | 6 | 7 | 8 | 9 | 10 |
| 11 | 12 | 13 | 14 | 15 | 16 | 17 |
| 18 | 19 | 20 | 21 | 22 | 23 | 24 |
| 25 | 26 | 27 | 28 | 29 | 30 | 31 |
- 장고
- yaml
- Web Programming
- k8s
- Computer Vision
- pytorch
- GUI
- kubernetes
- vue.js
- 딥러닝
- paper review
- OpenCV
- 파이토치
- Python
- 텐서플로우
- POD
- numpy
- Tkinter
- tensorflow
- 컴퓨터 비전
- Docker
- MariaDB
- 웹 프로그래밍
- FLASK
- Deep Learning
- 파이썬
- 데이터베이스
- 논문 리뷰
- 그래픽 유저 인터페이스
- Django
- Today
- Total
Maxima's Lab
[Python, Tkinter] Graphic User Interface (GUI) - Button(버튼) 생성 본문
[Python, Tkinter] Graphic User Interface (GUI) - Button(버튼) 생성
Minima 2022. 7. 16. 21:56안녕하세요, 오늘은 Tkinter 모듈을 사용하여, GUI 중 Button(버튼)을 생성하는 방법에 대해서 알아보겠습니다.
다음과 같은 과정을 통해 윈도우 창 내에 2개의 프레임을 생성 후 3개의 버튼을 생성하여, 각 버튼을 클릭 시에 2번째 프레임의 Background Color을 Blue, Green, Color로 변환하는 버튼들을 생성해보겠습니다.
- Window(윈도우) 창을 생성합니다.
- Frame 2개를 생성합니다. (Frame-1, Frame-2)
- Frame-2의 Background Color를 변환할 수 있는 함수를 3개(Blue, Green, Red) 생성합니다.
- Frame-1 내부에 3개의 버튼(Blue, Green, Red)를 생성하며, 이때 위에서 생성한 3개의 함수를 대응시킵니다.
from tkinter import *


win = Tk()
win.title("Maxima")
win.geometry("800x600+200+200")
win.resizable(False, False)

frame_1 = Frame(win, relief="solid", bd=10)
frame_2 = Frame(win, relief="solid", bd=10)

label_1 = Label(frame_1, text='Frame-1')
label_2 = Label(frame_2, text='Frame-2')
label_1.pack(); label_2.pack()

def color_blue():
    button_1.config(fg="blue"); button_2.config(fg="black"); button_3.config(fg="black")
    frame_2.config(bg="blue")
def color_green():
    button_1.config(fg="black"); button_2.config(fg="green"); button_3.config(fg="black")
    frame_2.config(bg="green")
def color_red():
    button_1.config(fg="black"); button_2.config(fg="black"); button_3.config(fg="red")
    frame_2.config(bg="red")

button_1 = Button(frame_1, text="Button-1\n(Blue)", height=10, command=color_blue)
button_2 = Button(frame_1, text="Button-2\n(Green)", height=10, command=color_green)
button_3 = Button(frame_1, text="Button-3\n(Red)", height=10, command=color_red)

button_3.pack(side="bottom", fill="x", expand=True)
button_2.pack(side="bottom", fill="x", expand=True)
button_1.pack(side="bottom", fill="x", expand=True)

frame_1.pack(side="left", fill="both", expand=True, padx=5, pady=5)
frame_2.pack(side="left", fill="both", expand=True, padx=5, pady=5)


win.mainloop()
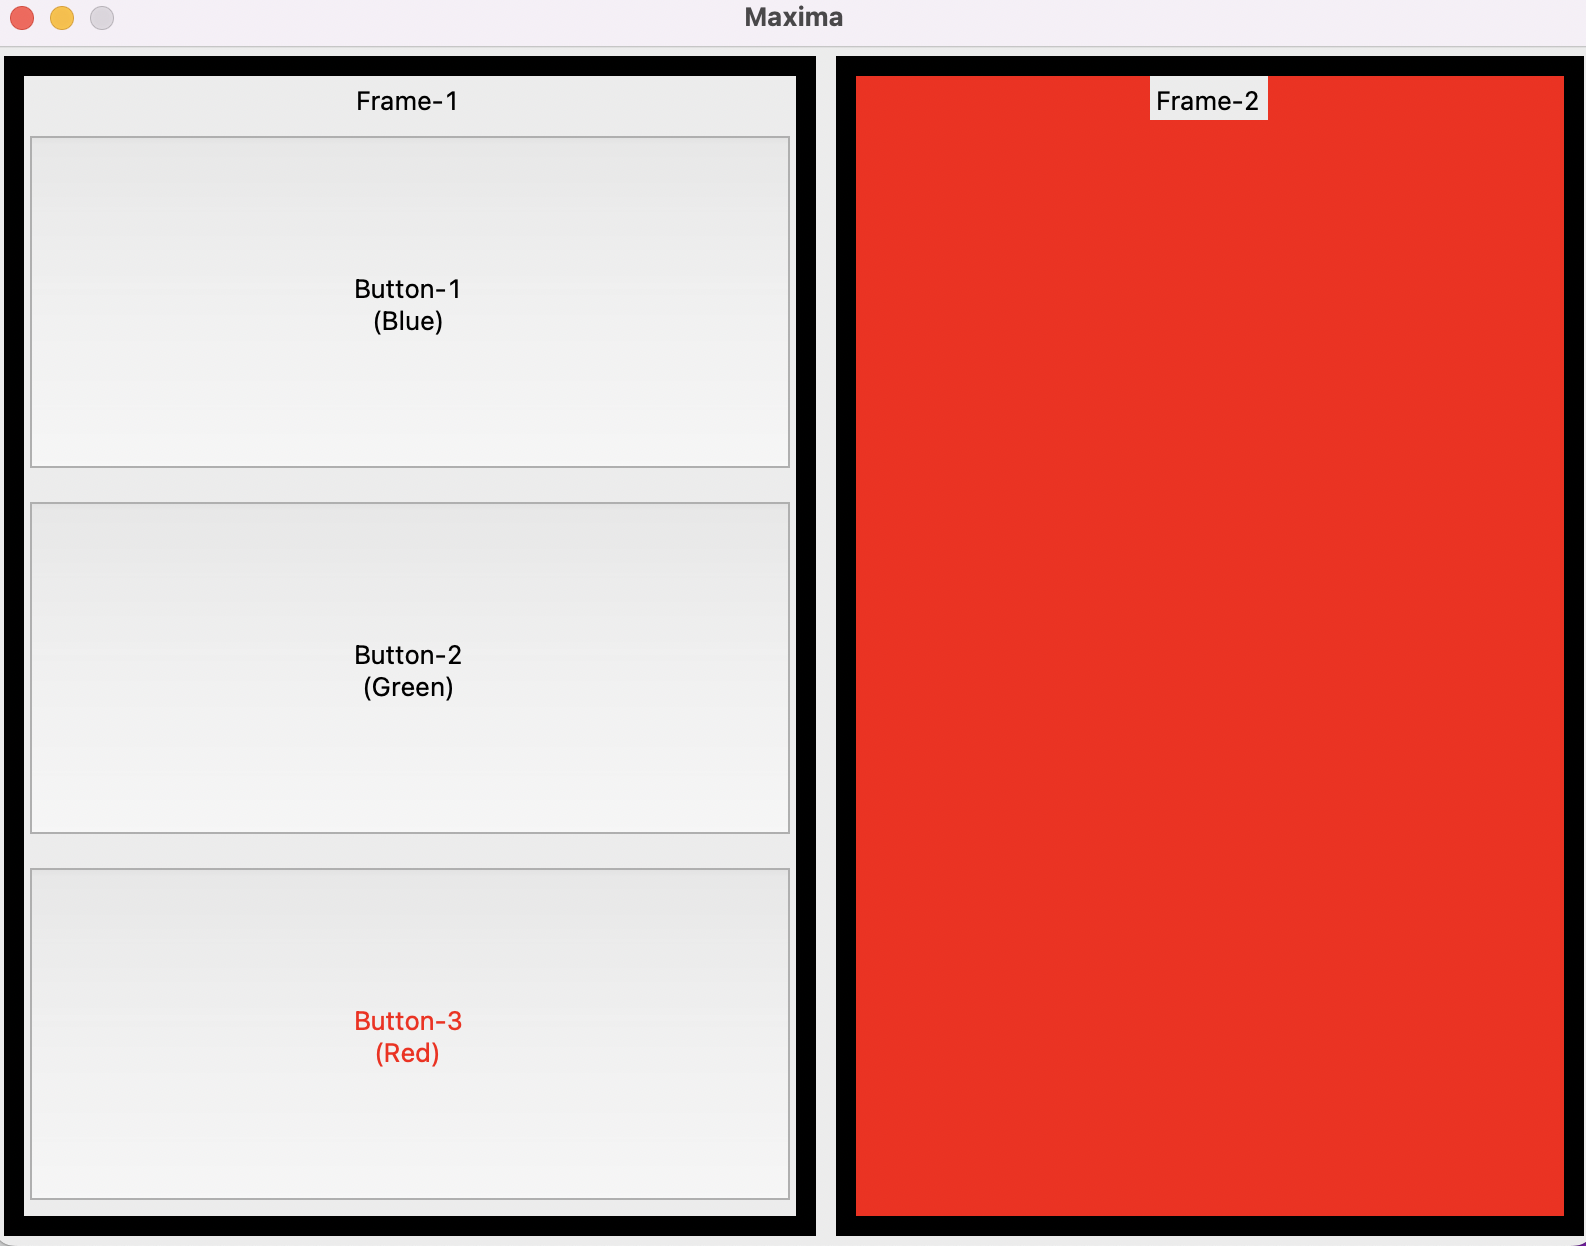
다음은 윈도우 창이 최초 생성 시 초기 화면입니다.

위의 화면과 같이 Frame-1에는 3개의 Buttons이 생성되어 있는 것을 확인할 수 있습니다. 전체 코드 내 세부적인 코드들에 대해서 알아보겠습니다. 다음은 Button Click 시 실행되는 함수에 대한 코드입니다.
def color_blue():
    button_1.config(fg="blue"); button_2.config(fg="black"); button_3.config(fg="black")
    frame_2.config(bg="blue")
def color_green():
    button_1.config(fg="black"); button_2.config(fg="green"); button_3.config(fg="black")
    frame_2.config(bg="green")
def color_red():
    button_1.config(fg="black"); button_2.config(fg="black"); button_3.config(fg="red")
    frame_2.config(bg="red")
첫번째, color_blue() 함수는 Button-1를 클릭 시 blue color로 글자로 바꾸며, 나머지 Button-2, Button-3 내 글자들은 black color로 변환하고 최종적으로 Frame-2의 Background Color를 blue color로 변환합니다. color_green() 함수와 color_red() 함수들도 유사한 방식으로 작동하게 됩니다.
이어서, 위의 함수들과 버튼들을 연결시키기 위해 Button을 생성하는 방법에 대해서 알아보겠습니다.
button_1 = Button(frame_1, text="Button-1\n(Blue)", height=10, command=color_blue)
button_2 = Button(frame_1, text="Button-2\n(Green)", height=10, command=color_green)
button_3 = Button(frame_1, text="Button-3\n(Red)", height=10, command=color_red)
각 Button들은 Frame-1에 연결시키고, text를 위와 같이 설정 후 command 옵션을 통해 각각 color_blue, color_green, color_red 함수들을 대응시켜주었습니다.
다음은, 각 Button-1, Button-2, Button-3를 클릭했을 때의 결과들입니다.


지금까지, Tkinter 모듈을 사용하여, Graphic User Interface (GUI)의 Button(버튼)을 생성하는 방법에 대해서 알아보았습니다.


